The Perfect (Recycled) Cutting Starter
Container
Sometimes we have to make a better
mousetrap. I like all the ideas on
Pinterest but I also like to deal with and use what I have at hand. At my house people drink pop from cans so I
do not have a supply of two liter bottles.
My good luck is that they drink a lot of milk. So rather than throw bottles away I have learned
to make real neat starter containers out of them. You will notice the bottles have indents on
the sides. (some don’t, but that is not a problem) The indents help lock the top on.

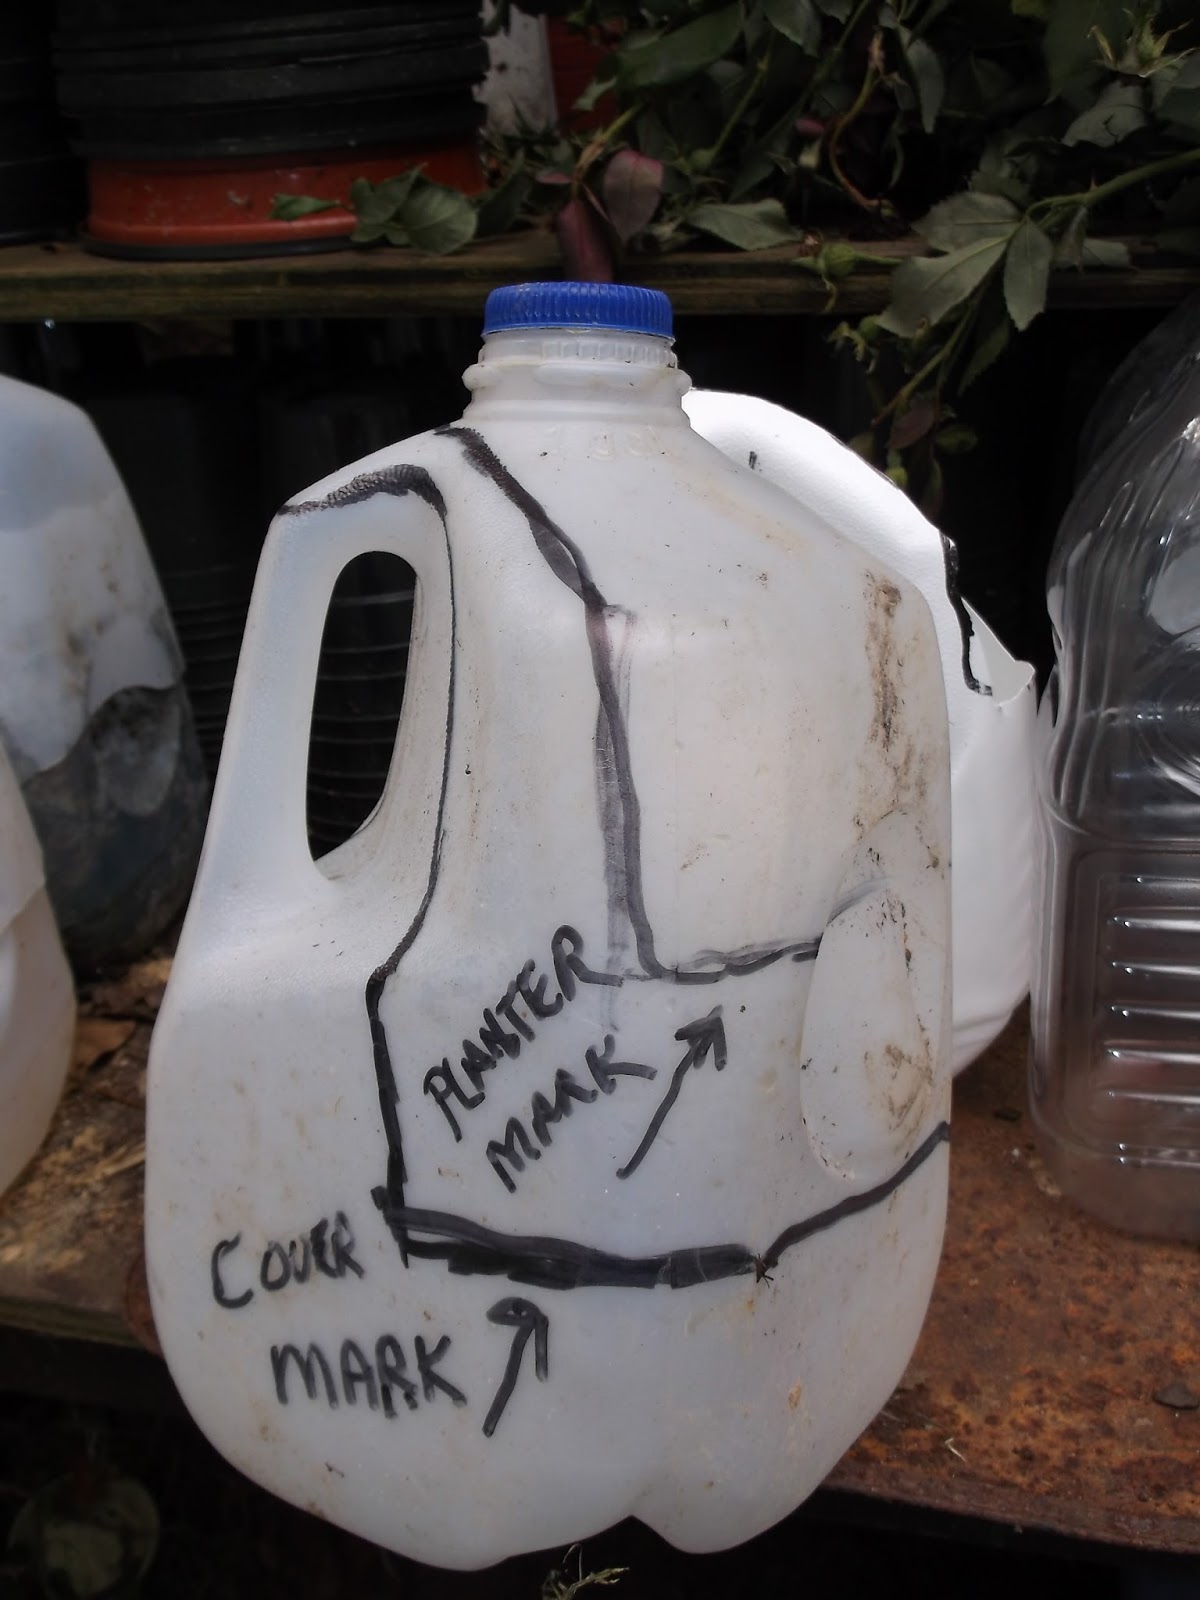
Picture two shows the markings as to how and where the cut lines are. Yes it takes two bottles to make one container, but hey you were going to throw it away anyhow right. If I run short I go to the recycle center and get a trash bag full for nothing or next to nothing. If you ask friends to save them for you they will be coming out your ears. One word of advice as it may be awhile before you use them. Rinse them out before you store them.
,


The drainage slits do not have to be big or fancy

To remove the grown plant simple cut on the dotted lines. Insert you hand under the plant and slide out. You can also make it like a big U and go down the corners and across the front. Whichever seems simplest for you. The shown can be duct taped closed and recycled again, sometimes.

This part may get a little redundant, but I had problems getting the pictures to load the way I wanted them to do. So just bare with me. There are a couple good points in this part though.
Picture two shows the markings as to how
and where the cut lines are. Yes it
takes two bottles to make one container, but hey you were going to throw it
away anyhow right. If I run short I go
to the recycle center and get a trash bag full for nothing or next to
nothing. If you ask friends to save them
for you they will be coming out your ears.
One word of advice as it may be awhile before you use them. Rinse them out before you store them.
The key is how you cut the handle. On the container you want to save it so you
can use it to move the container when you have to. The lid however does not need the handle but
a little tab of it helps line it up when you put the cover on. When you cut the container, you cut between
the cap and the handle. Then you cut to
the top of the shoulders on each side of the jug. Then down about a quarter of the way. You can adjust this based on what you are
starting. I like to have four to five
inches of dirt. I usually put four to five rose cuttings in each container. With butterfly bushes I only put two or
three. Some plants I only put one
cutting in. That is up to you. Then you
cut around the front and you are done with the container. Well make some slices in the bottom to allow
for drainage. Most plants don’t like wet
feet. Now you are done. For the top you
cut above the handle and then down each side of the handle and go down maybe
three quarters of the way. You want it to cover the container and
keep out the weather.
The upside is it is cheap it keeps
plastic out of the landfill, at least for a while. The down side is you can’t see the plant very
well without removing the cover but that is very easy to take off and to put back. That is a plus to this design that you can open it to the weather when you want to. One benefit is they do not get quite as hot
as the clear plastic. I used to buy pots
for taking the plants to market. Doing
them this way I can sell them a little cheaper.
If you want to you can take them to market in the milk container and the
handle makes them real easy move around and load. You can
also write on the plastic what kind of plant it is. I use spray paint to color code my
plants. Especially stuff like melons and
gourds that all look very similar at the starting of the growing cycle.
Some plants are more sensitive to
transplant shock than others. If I grow
the plants bigger in the container to make it sell better I tell people to cut
on the dotted line and put their hand in under the plant and just ease it
out. No stress or damage to the plant
occurs this way. Of course you can’t
reuse the container if you cut it(Unless you believe in duct tape) but hey it was trash when it started and to
trash it has returned It is the old
ashes to ashes and dust to dust thing .
When I take them inside and sit them on
the window ledge. I put them in an old
pie tin to prevent water damage. I get them at yard sales and Good Will or the Salvation Army. Sometimes I will make the ultimate sacrifice and actually eat a pie.
One thing to pay attention to is where
you put the containers. While plants
love sunshine, cuttings need TLC and just subdued light part of the day is
usually fine. Direct sun can have the
effect of turning the container into a microwave oven and finish the plant
before it gets started.
Hope somebody gets some use out of this
one….Have a Gourd-eous Day. Guess I just
gave away my plant preference.

No comments:
Post a Comment